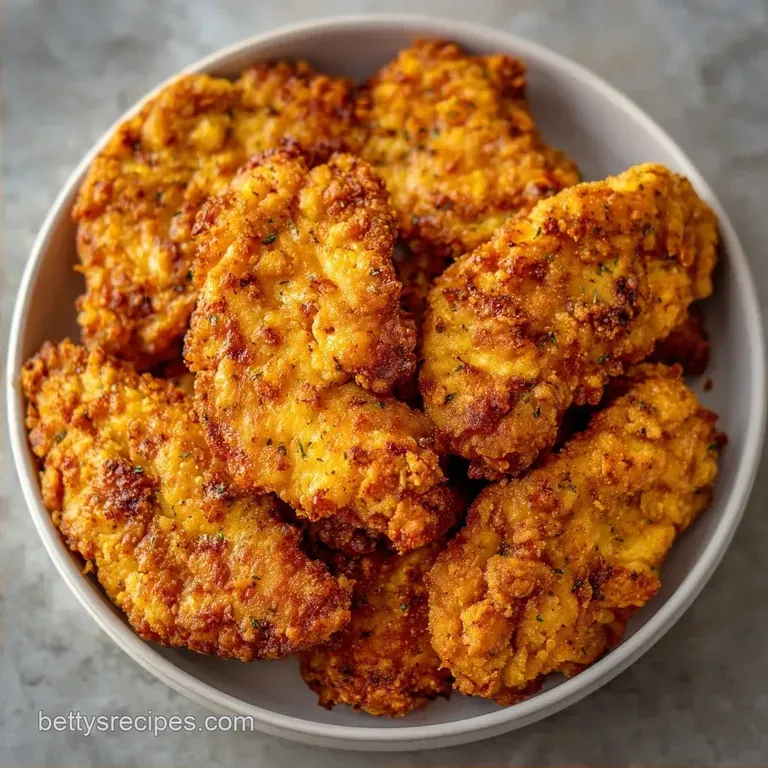
Chicken Tenders: Ultra-Crispy and Homemade
- Time: 15 min active + 20 min cooking
- Flavor/Texture Hook: Mahogany colored, shatter crisp crust with a tangy, velvety interior
- Perfect for: Stress free weeknight dinners or a crowd-pleasing game day snack
That loud, satisfying crack when you bite into a piece of fried chicken is the only sound that matters in a kitchen. I remember the first time I tried to make these at home, and it was a disaster. I put the meat straight on a baking sheet, and while the tops looked great, the bottoms were a pale, mushy mess.
I practically had to peel the chicken off the pan. It was a lesson learned the hard way.
The secret isn't just the breading, it's how the heat hits the meat. When you lift the food off the pan, the hot air can actually wrap around the bottom. That's how you get that uniform, golden crunch without having to deep fry everything in two inches of oil.
We're making Chicken Tenders that actually taste like they came from a specialty spot, but without the grease. This is all about the prep flow, from the tangy soak to the over high heat finish. Trust me, once you do the rack method, you'll never go back to flat pan baking.
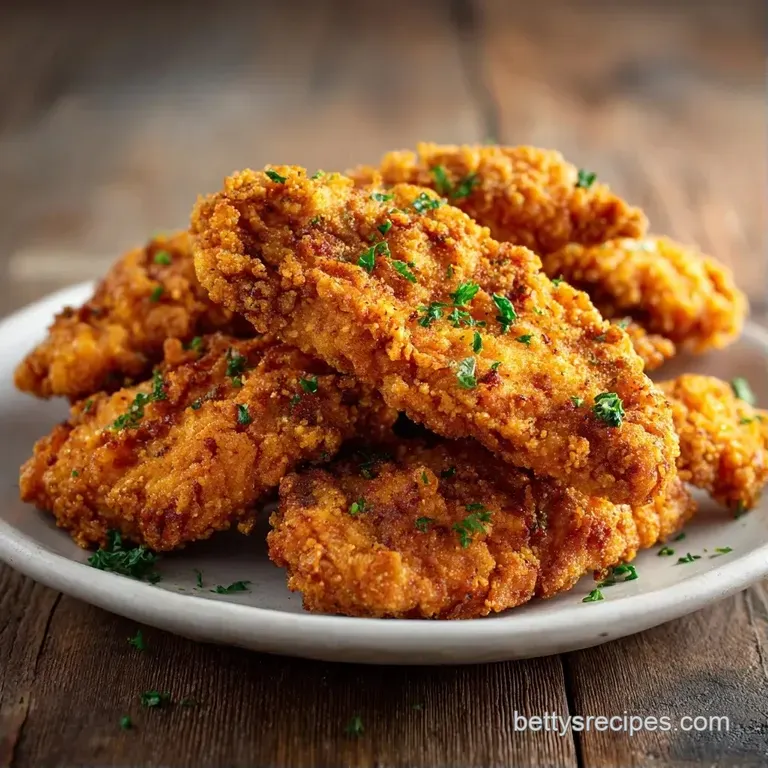
Crispy Baked Chicken Tenders
Right then, let's get into why this actually works. Most people just dip and bake, but that's why the coating often slides right off the meat. We're using a two stage process to lock everything in place.
- Acid Tenderizing
- The lactic acid in buttermilk breaks down tough fibers, making the meat velvety.
- Fat Binding
- Adding melted butter to the Panko crumbs creates tiny pockets of oil that fry the breading from the inside out.
- Air Circulation
- Using a wire rack prevents steam from trapping under the meat, which is what usually causes that soggy bottom.
- Protein Grip
- The light dusting of flour in the breading helps the crumbs cling to the wet buttermilk coating.
| Method | Prep Time | Texture | Best For |
|---|---|---|---|
| Stovetop Fry | 15 mins | Heavy Crunch | Indulgent weekends |
| Oven Baked | 15 mins | Light & Shattery | Weeknight meals |
| Air Fryer | 15 mins | Very Dry Crisp | Small batches |
Why Most Recipes Fail
The biggest mistake I see is rushing the brine. If you don't let the chicken sit in the buttermilk, you're missing the chance to flavor the meat all the way through. I once tried to skip the soak to save ten minutes, and the result was a bland piece of meat hiding under a salty crust.
It felt like eating a salted cracker with a piece of steamed chicken inside.
Then there's the breading issue. People often use standard breadcrumbs, which are too fine. They pack together into a dense layer that steams rather than crisps. Panko is different because the flakes are larger and airier. They create more surface area for the heat to hit, resulting in that signature shatter.
Finally, there is the temperature trap. If your oven is too low, the chicken cooks slowly, and the moisture from the meat seeps into the breading before it has a chance to crisp. By cranking it up to 425°F (218°C), we flash fry the exterior while keeping the inside tender.
The Recipe Specs
Before we start, let's look at the components. This isn't about being fancy; it's about using the right tools for the job. I prefer using a wide mixing bowl for the soak so the strips aren't crammed together. If they're overlapping too much, the buttermilk doesn't hit every inch of the meat.
For the breading, a shallow dish or a pie plate works best. It gives you plenty of room to press the chicken down firmly. If you use a deep bowl, you end up bunching up the crumbs in one spot, and your coating will be uneven.
Ingredient Deep Dive
Every part of this recipe has a job. It's not just about flavor; it's about how the ingredients react under high heat.
| Ingredient | Science Role | Pro Secret |
|---|---|---|
| Buttermilk | pH Balance | Use full fat for a creamier mouthfeel |
| Panko | Structural Air | Toast them slightly for deeper color |
| Parmesan | Salt & Umami | Use finely grated "powder" for better adhesion |
| Melted Butter | Thermal Conduit | Adds a nutty aroma that oil lacks |
Essential Kitchen Tools
You don't need a professional kitchen, but a few specific items make this stress free. A wire cooling rack is the non negotiable here. If you don't have one, you can use the rack that comes with your baking sheet, as long as it's elevated.
I also suggest using a pair of tongs. Trying to move buttermilk soaked chicken with your fingers is a recipe for a messy kitchen and uneven breading. Tongs let you dip, drip, and press without creating a disaster on your counters.
The Cooking Process
Let's crack on with the actual steps. Follow the timing exactly to get that mahogany color.
- Whisk the buttermilk, garlic powder, smoked paprika, salt, and black pepper in a medium bowl. Note: The paprika adds a subtle earthiness and helps with the final color.
- Add the chicken tenderloins to the mixture and ensure they are fully submerged. Let them sit for 10-15 minutes.
- In a separate bowl, combine Panko breadcrumbs, all purpose flour, grated Parmesan cheese, onion powder, and cayenne pepper.
- Drizzle the melted unsalted butter over the breadcrumb mixture and toss with a fork to coat. Note: This ensures every crumb is primed for browning.
- Preheat your oven to 425°F (218°C).
- Lift each piece of chicken from the brine and let the excess buttermilk drip off for a second.
- Press the chicken firmly into the crumb mixture. Make sure the coating is heavy and covers the ends.
- Place the breaded Chicken Tenders on a wire rack set above a baking sheet.
- Bake for 15-18 minutes until the crust is mahogany colored and the internal temperature reaches 165°F (74°C).
Chef Note: If you want a deeper color, you can spray the tops of the tenders with a tiny bit of cooking oil right before they go in the oven.
Troubleshooting Your Tenders
Even with a plan, things happen. Sometimes the crust doesn't behave, or the meat feels off. Most of these issues come down to moisture management.
For Crust That Peels Off
This usually happens because there was too much buttermilk on the chicken when it hit the crumbs. It creates a slippery layer that prevents the breading from bonding to the protein.
For Pale, Non Crispy Tenders
If your Chicken Tenders look white or pale, your oven temperature is likely too low. Without that high heat, the butter in the crumbs doesn't "fry" the exterior.
For a Rubbery Texture
Overcooking is the enemy here. Because these are small strips, they can go from juicy to rubbery in just two minutes. Always use a meat thermometer.
| Problem | Root Cause | Solution |
|---|---|---|
| Soggy Bottom | Lack of airflow | Use a wire rack, not a pan |
| Clumpy Coating | Butter not mixed | Toss crumbs thoroughly before dipping |
| Bland Flavor | Short brine time | Soak for at least 10 minutes |
Common Mistakes Checklist
- ✓ Did you let the buttermilk drip off before breading?
- ✓ Is the oven fully preheated to 425°F (218°C)?
- ✓ Did you press the crumbs firmly into the meat?
- ✓ Are the tenders spaced apart on the rack?
Customizing Your Crunch
Once you've got the base down, you can play around with the flavors. I love adding a bit of lemon zest to the Panko mixture for a brighter, fresher taste. It cuts through the richness of the butter and Parmesan.
For a spicy Nashville twist, you can mix a tablespoon of the hot frying oil (or melted butter) with extra cayenne and brown sugar, then brush it on the tenders the moment they come out of the oven. It gives them that glossy, fiery look.
If you're looking for a gluten-free swap, you can use almond flour and gluten-free Panko. According to some home cook experiences, almond flour provides a moisture rich but denser crumb than AP flour, so you might need to add 2-3 minutes to the bake time. This is a great way to keep the dish accessible for everyone. If you're serving this as part of a larger snack spread, these pair well with Picky Eater Pizza Bites for a variety of textures.
| If you want... | Do this... |
|---|---|
| Extra Heat | Add 1/2 tsp more cayenne to the crumbs |
| Nutty Flavor | Swap Panko for crushed cornflakes |
| Cheesy Punch | Use Pecorino Romano instead of Parmesan |
Kitchen Myths
There are a few things people tell you about frying and baking that just aren't true.
Myth: Searing "seals in" the juices. This is a classic mistake. Searing creates a crust for flavor, but it doesn't actually stop moisture from leaving the meat. The only way to keep these Chicken Tenders juicy is by not overcooking them.
Myth: You must deep fry to get a "shatter" crunch. While deep frying is great, the combination of Panko, melted butter, and high oven heat (425°F) creates a very similar effect. The butter acts as the frying medium, just on a smaller scale.
Storage and Scraps
If you have leftovers, don't just throw them in a plastic container while they're hot. The steam will turn your beautiful crust into a sponge. Let them cool completely on the rack first.
Storage: Keep them in an airtight container in the fridge for up to 3 days. To reheat, avoid the microwave. Put them back in the oven or an air fryer at 350°F (180°C) for 5-7 minutes until they sizzle again.
Freezing: You can freeze these after breading but before baking. Flash freeze them on a tray for an hour, then toss them in a freezer bag. They'll last for 3 months. Bake from frozen, adding about 5 minutes to the cook time.
Zero Waste: Don't toss that leftover buttermilk! It's a fantastic base for pancakes or waffles the next morning. If you have leftover Panko crumbs, you can toast them in a pan with a bit of garlic and sprinkle them over a salad or a pasta dish.
It's a great way to add texture without wasting ingredients.
Best Side Pairings
Since these are hearty and savory, you want sides that provide a bit of contrast. Something creamy or acidic works best to balance the fried nature of the dish.
A classic choice would be my Mac and Cheese recipe, which doubles down on the comfort food vibe. If you want something lighter, a vinegar based coleslaw or a crisp cucumber salad provides the acidity needed to cut through the butter and cheese.
For a full on feast, I like to serve these with a side of honey mustard or a spicy sriracha mayo. The sweetness of the honey or the tang of the mayo brings out the smoked paprika in the breading.
Right then, you've got everything you need to make these Chicken Tenders. Just remember: use the rack, don't skimp on the soak, and keep a close eye on that mahogany color. Happy cooking!
Recipe FAQs
What is the secret to making the chicken tender?
Soak them in a buttermilk brine. Letting the strips sit in buttermilk, garlic powder, smoked paprika, salt, and pepper for 10 15 minutes breaks down proteins for a juicier interior.
How to make the best chicken tenders from scratch?
Brine the chicken in buttermilk and spices, then press into a Panko Parmesan crumb mixture. Bake at 425°F (218°C) on a wire rack for 15 18 minutes until the internal temperature reaches 165°F (74°C).
Are these a good dinner option for picky eaters?
Yes, they are highly kid-friendly. The golden, crunchy texture and mild savory flavor make them a reliable choice for children or adults with limited preferences.
How to store and reheat leftovers without losing crunch?
Cool them completely on a rack before refrigerating in an airtight container. Reheat in the oven or air fryer at 350°F (180°C) for 5 7 minutes to restore the crispiness.
How do I freeze these tenders for later?
Flash freeze the breaded strips on a tray for one hour. Transfer them to a freezer bag once frozen solid to prevent them from clumping together.
Is it true that I should bake them directly on a baking sheet?
No, this is a common misconception. Using a wire cooling rack elevated above the sheet allows hot air to circulate under the meat, preventing the bottoms from becoming soggy.
What can I serve with these chicken tenders for a family meal?
Pair them with a side of steamed vegetables or a light salad. These also complement a family pasta dinner for a more filling meal.
Ultra Crispy Chicken Tenders

