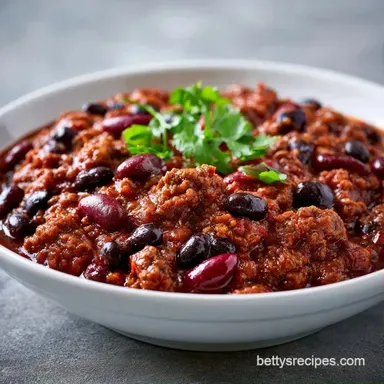
Simple Bean Chili with Ground Beef
- Time: 20 min active + 45 min simmering
- Flavor/Texture Hook: Smoky, thick, and hearty
- Perfect for: Stress free weeknight meal prep
- Bean Chili: A Hearty One Pot Meal
- Getting the Texture Right
- The Essential Recipe Specs
- Everything You'll Need
- The Right Cooking Tools
- Simple Step-by-Step Instructions
- Fixing Common Bean Chili Problems
- Troubleshooting Common Issues
- Smart Swaps and Variations
- Scaling Your Batch
- Debunking Kitchen Myths
- Storing Your Leftovers
- Serving Your Finished Meal
- Recipe FAQs
- 📝 Recipe Card
Bean Chili: A Hearty One Pot Meal
That first sizzle of ground beef hitting a hot pot is the best part of the whole process. I remember a rainy Tuesday a few years back when I tried to rush this by just boiling the meat with the tomatoes. It turned out grey, bland, and honestly, a bit depressing.
I realized then that the time you spend at the start determines if your meal is just "okay" or if it actually hits the spot.
This Bean Chili is all about building layers. We aren't just dumping cans into a pot and hoping for the best. We're browning, toasting, and simmering to get a rich, dark base that holds up to all those beans. It's a joyful, low stress way to feed a crowd without spending six hours in the kitchen.
You can expect a thick, spoonable consistency that doesn't run all over the plate. Whether you're serving it to picky kids or bringing it to a potluck, this version stays consistent every time. Trust me, the extra few minutes spent browning the beef makes all the difference.
Getting the Texture Right
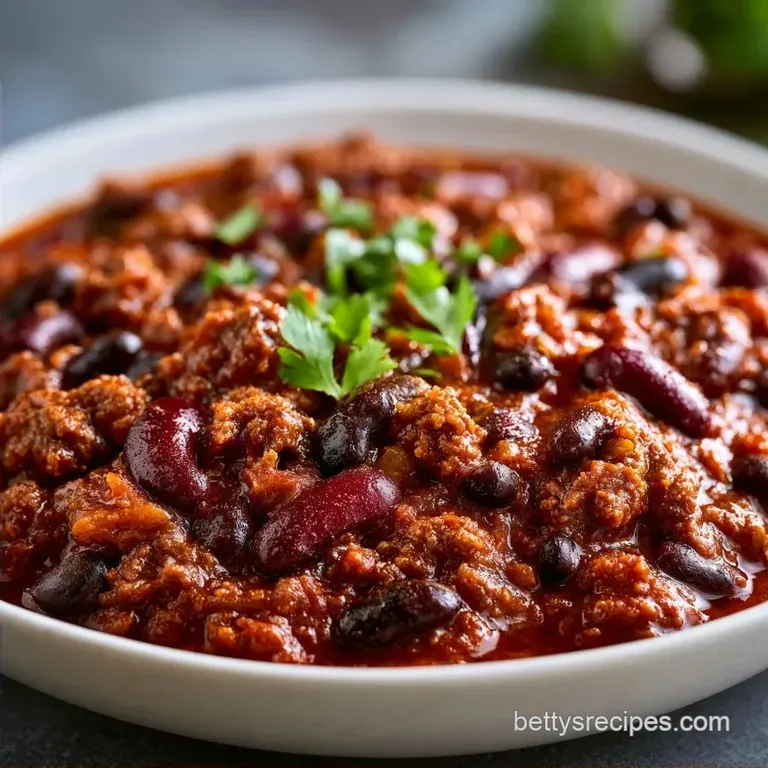
The goal for a great Bean Chili is a sauce that clings to the beans rather than a watery soup.
- Searing the Beef: Browning the meat until it's deeply caramelized creates a savory foundation. According to Serious Eats, this process adds complexity that you just can't get from boiling.
- The Paste Trick: Cooking the tomato paste alone for two minutes removes the raw, metallic edge and thickens the liquid.
Right then, let's look at how this approach compares to the traditional slow cook method.
| Feature | Fast Stovetop | Classic Slow Simmer |
|---|---|---|
| Time | 65 minutes | 4-8 hours |
| Depth | Bright and punchy | Mellow and blended |
| Texture | Thick and chunky | Very soft/broken down |
But what about the beans? Using three different types adds different textures, from the creaminess of the pinto to the bite of the kidney bean.
The Essential Recipe Specs
Before we dive into the pot, let's get the timing and the flow sorted. This is a plan based execution, so you can prep your chopping while the beef browns.
- 1. The Sear (15 mins)
- Beef, onions, garlic, and paste.
- 2. The Build (10 mins)
- Spices, tomatoes, and broth.
- 3. The Finish (40 mins)
- Beans and the slow simmer.
Precision Checkpoints:
- Beef should reach a deep brown color within 8-10 minutes.
- Tomato paste should turn a brick red hue after 2 minutes of stirring.
- The final simmer should reduce the liquid by about 15% over 45 minutes.
Everything You'll Need
I prefer using a heavy bottomed pot because it distributes heat evenly. Don't bother with thin pots, as the tomato paste tends to stick and burn.
- 1 lb ground beef Why this? Provides the rich, savory base
- 1 medium yellow onion, diced Why this? Adds a necessary sweetness
- 3 cloves garlic, minced Why this? Essential aromatic punch
- 2 tbsp olive oil Why this? Prevents sticking and carries flavor
- 1 can (15 oz) kidney beans, drained and rinsed Why this? Holds shape during simmering
- 1 can (15 oz) black beans, drained and rinsed Why this? Adds an earthy tone
- 1 can (15 oz) pinto beans, drained and rinsed Why this? Adds a creamy texture
- 1 can (28 oz) crushed tomatoes Why this? Creates the thick body
- 1 can (14.5 oz) diced tomatoes Why this? Adds chunks for texture
- 2 tbsp tomato paste Why this? Deepens the color and taste
- 3 tbsp chili powder Why this? The core spice profile
- 1 tbsp ground cumin Why this? Adds a smoky, nutty warmth
- 1 tsp smoked paprika Why this? Gives a hint of wood fire
- 1 tsp salt Why this? Enhances all other flavors
- 1/2 tsp black pepper Why this? Adds a subtle bite
- 1 cup beef broth Why this? Balances the acidity of tomatoes
| Original Ingredient | Substitute | Why It Works |
|---|---|---|
| Ground Beef | Ground Turkey | Leaner option. Note: Lacks some depth; add 1 tsp soy sauce to compensate |
| Beef Broth | Vegetable Broth | Keeps it lighter. Note: Slightly sweeter profile |
| Kidney Beans | Cannellini Beans | Same texture. Note: Changes the color to a lighter brown |
The Right Cooking Tools
You don't need a fancy kitchen for this, but a few specific tools make the flow much smoother.
- Dutch Oven: This is the gold standard. The heavy lid keeps the moisture in while the thick bottom prevents the beef from scorching.
- Wooden Spoon: Better than metal for scraping the browned bits (the fond) off the bottom without scratching your pot.
- Colander: Essential for rinsing the beans. Leaving the canning liquid in can make your Bean Chili taste too salty or metallic.
- Chef's Knife: A sharp blade makes dicing that onion a breeze.
Simple step-by-step Instructions
Let's crack on. Keep your ingredients prepped and nearby so you aren't scrambling while the garlic is cooking.
- Heat olive oil in a Dutch oven over medium high heat. Note: Wait until the oil shimmers before adding meat.
- Add the ground beef and cook, breaking it apart with a spoon, until the meat is deeply browned and no longer pink.
- Stir in the diced onion and cook for 5 minutes until translucent and soft.
- Add the minced garlic and cook for 1 minute until fragrant.
- Push the meat mixture to the side and add the tomato paste to the center of the pot. Stir for 2 minutes until the paste turns a darker brick red.
- Stir in the chili powder, cumin, smoked paprika, salt, and pepper. Toast the spices with the meat for 60 seconds. Note: This "blooming" step wakes up the oils in the spices.
- Pour in the crushed tomatoes, diced tomatoes, and beef broth. Stir well to scrape up any browned bits from the bottom of the pot.
- Fold in the kidney, black, and pinto beans and simmer for 45 minutes. until the sauce is thick and glossy.
Fixing Common Bean Chili Problems

Even the best home cooks hit a snag now and then. Usually, it's a matter of liquid ratios or acid balance.
Troubleshooting Common Issues
| Issue | Solution |
|---|---|
| Why Your Chili Is Too Watery | This usually happens if the heat was too low or the lid was on too tight, preventing evaporation. You want a slow bubble, not a stagnant pool. |
| The Chili Tastes Too Acidic | Too many tomatoes can lead to a sharp, sour taste. A tiny pinch of brown sugar or a dollop of sour cream at the end neutralizes this. |
| How to Fix a Chili That Is Too Spicy | If you went too heavy on the chili powder, don't panic. Adding more beans or a bit of extra beef broth can dilute the heat. |
Smart Swaps and Variations
One of the best things about a basic bean chili recipe is how easy it is to tweak. You can change the protein or the heat level based on who you're feeding.
If you want a "Texas Style" twist, leave out the beans entirely and add a bit of chopped brisket. For those looking for something lighter, I've found that swapping the beef for ground turkey works well, provided you add a splash of Worcestershire sauce for depth.
Can I make this a Three bean chili vegetarian? Absolutely. Just swap the beef for an extra can of chickpeas or chopped mushrooms, and use vegetable broth instead of beef broth. If you're in the mood for something different but still want those hearty legumes, try my Sweet Potato Bean Skillet for a faster meal.
Decision Shortcut:
- If you want it smokier, add a chopped chipotle pepper in adobo.
- If you want it creamier, stir in 2 tbsp of cream cheese at the end.
- If you want more heat, add diced jalapeños during the onion stage.
Scaling Your Batch
Scaling a Simple Bean Chili is pretty straightforward, but you can't just double everything blindly.
Scaling Down (½ batch): Use a smaller pot to prevent the liquid from evaporating too quickly. Reduce the simmering time by about 20%, as a smaller volume of liquid reaches the desired thickness faster.
Scaling Up (2x-4x batch): Be careful with the salt and smoked paprika. Start with 1.5x the spices and taste before adding the full amount. Liquids generally don't need to be doubled exactly; start with 1.7x the broth and add more only if the pot looks too dry.
If you're using a standard home stove, work in batches when browning the beef to avoid steaming the meat.
Debunking Kitchen Myths
There are a few things people always say about Bean Chili that just aren't true.
First, searing meat does not "seal in juices." That's a total myth. The moisture leaves the meat regardless. The reason we sear is for flavor the browned crust adds a depth that boiling simply can't match.
Second, some people think canned beans are "unhealthy" or tasteless. While drying your own beans is a fun project, canned beans are a great time saver. As long as you rinse them well, they work perfectly in this recipe and keep the process stress free.
Storing Your Leftovers
This Bean Chili actually tastes better the next day because the flavors have more time to mingle.
Storage Guidelines: - Fridge: Store in an airtight container for up to 4 days. - Freezer: This freezes beautifully. Use freezer safe bags or containers and it'll stay good for 3 months.
Zero Waste Tips: Don't toss the leftover bits of onion or garlic skins; throw them in a freezer bag for your next homemade veggie stock. If you have a small amount of bean liquid left in the can, you can stir it into a soup for a slight thickening effect.
Serving Your Finished Meal
The way you serve this is half the fun. I love setting up a little station so everyone can customize their bowl.
For the toppings, go for a mix of textures. Fresh diced avocado, a sprinkle of sharp cheddar, and a dollop of sour cream provide a silky contrast to the chunky beans. A few pickled jalapeños add a bright, vinegary pop that cuts through the richness.
For the perfect pairings, skip the boring white rice. I highly recommend serving this with my Sourdough Cheese Crackers for a satisfying crunch. If you're feeling fancy, a slice of honey cornbread on the side is the way to go.
Right then, you've got everything you need. This Bean Chili is a reliable, hearty meal that doesn't demand your whole weekend. Just remember to brown that beef and be patient with the simmer, and you'll have a pot of gold on your stove. Enjoy!
Recipe FAQs
Can you eat chili if diabetic?
Yes, it is generally diabetes friendly. The high fiber content from the kidney, black, and pinto beans helps slow glucose absorption and stabilize blood sugar.
What is the secret ingredient to a good chili?
Browning the tomato paste. Stirring the paste for 2 minutes until it turns a darker brick red creates a concentrated, caramelized depth of flavor.
What are common mistakes when making bean chili?
Under browning the meat and skipping the spice toast. Failing to brown the beef deeply or toast the spices for 60 seconds results in a flat, boiled taste rather than a rich one.
Is chili good for anemia?
Yes, it is a nutrient dense option. The combination of ground beef and various beans provides a significant amount of iron, which is essential for red blood cell production.
What's a simple, budget friendly meal you love to make?
Bean chili is a top choice. It utilizes affordable canned staples to feed a large group, similar to the efficiency of a ground beef dinner made in 30 minutes.
What are some cheap dinner ideas for six adults?
Prepare a large pot of bean chili. Since this recipe yields 8 servings, it is one of the most cost effective ways to provide a filling, high protein meal for a crowd.
Why is my chili too watery?
The heat was likely too low. If the simmer is too low or the lid is sealed too tight, moisture cannot evaporate, preventing the sauce from thickening.
Simple Bean Chili