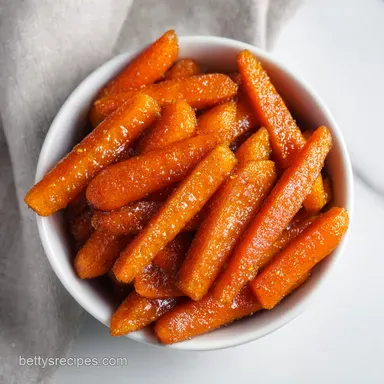
Easy Glazed Carrots Ball Canning Recipe: Sweet and Tangy
- Time: 60 min active + 30 min cook + 24 hrs resting = Total 25 hours 30 mins
- Flavor/Texture Hook: Velvety cinnamon syrup with a crisp, tender bite
- Perfect for: Winter pantry stocking and holiday side dish prep
The scent of simmering orange juice and warm cinnamon always hits me first, filling the entire kitchen with a smell that feels like a cozy winter morning. There is something about that specific aroma, combined with the sizzle of the glaze thickening in the pan, that makes canning feel less like a chore and more like a ritual.
I remember one particular batch where I got a bit lazy with the rims of my jars. I didn't wipe them down with vinegar, and sure enough, a tiny bead of syrup stayed on the edge. One of my jars failed to seal, and I had to spend the evening eating all those carrots myself.
It was a tasty mistake, but it taught me that in canning, the tiny details are the only things that actually matter.
This Easy Glazed Carrots Ball Canning Recipe is all about getting that balance right. You want a glaze that is thick enough to coat the carrots but not so syrupy that it becomes a candy.
It's a smart way to preserve the natural sweetness of the root vegetable while adding a sophisticated, zesty layer that makes them taste fresh cooked every time you open a jar.
Easy Glazed Carrots Ball Canning Recipe
When you first look at canning carrots, it might seem straightforward, but there is a fine line between a crisp carrot and a mushy one. Most people make the mistake of pre cooking the carrots before putting them in the jar, which leads to over processing in the pressure canner.
By packing them raw and using a steaming hot glaze, we let the pressure canner do the heavy lifting, ensuring a texture that is tender but still has a distinct bite.
Another common slip up is ignoring the headspace. If you fill the jar too high, the liquid boils over and messes with the seal. If it's too low, you get too much air, which can lead to spoilage. Sticking to that 1 inch gap is non negotiable.
It provides the necessary room for the liquid to expand and create that satisfying "pop" when the jar cools.
The real secret to this recipe is the orange juice. The acidity helps balance the sugar, preventing the glaze from feeling cloying. It also works with the pressure canning process to create a stable environment.
If you've ever tried a version that used only water and sugar, you know it lacks that bright, punchy finish that the citrus provides.
What Keeps Them Firm
Osmotic Balance: Salt draws out excess water from the carrot cells, which prevents them from absorbing too much glaze and becoming bloated.
Acid Stabilization: The citric acid in orange juice helps maintain the structural integrity of the pectin in the carrot walls during the over high heat process.
Pressure Thermal Transfer: Processing raw carrots under pressure ensures the heat penetrates the center of the stick quickly, avoiding the "mushy outside, raw inside" syndrome.
| Method | Prep Time | Texture | Best For |
|---|---|---|---|
| Quick Glazed | 15 mins | Very Soft | Immediate serving |
| Classic Canned | 60 mins | Crisp Tender | long term storage |
Component Analysis
| Ingredient | Science Role | Pro Secret |
|---|---|---|
| Carrots | Primary Structure | Use uniform sticks for even heat |
| Brown Sugar | Glaze Viscosity | Light brown sugar keeps color vibrant |
| Orange Juice | pH Regulator | Strain it to avoid pulp clumps |
| Sea Salt | Moisture Control | Toss early to "sweat" the veg |
Recipe Breakdown
For this process, you will need a few specific items. We are working with about 907g (2 lbs) of carrots. I highly recommend getting the smaller, sweeter carrots if you can find them, as they hold their shape better.
Ingredients:
- 907g (2 lbs) carrots, peeled and sliced into sticksWhy this? Uniform sticks ensure the heat penetrates evenly during canning
- 5g (1 tsp) sea saltWhy this? Draws out moisture to prevent mushiness
- 100g (1/2 cup) light brown sugarWhy this? Adds a caramel note without overpowering the carrot
- 240ml (1 cup) fresh orange juice, strainedWhy this? Provides the necessary acidity for flavor and safety
- 2g (1/2 tsp) ground cinnamonWhy this? Warmth that complements the natural sweetness
- 1g (1/4 tsp) ground gingerWhy this? Adds a subtle zing to cut through the sugar
Substitution Options:
| Original Ingredient | Substitute | Why It Works |
|---|---|---|
| Light Brown Sugar | Maple Syrup | Similar sweetness. Note: Changes flavor to woody/earthy |
| Orange Juice | Pineapple Juice | High acidity. Note: Adds a more tropical, sweet profile |
| Ground Ginger | Fresh Grated Ginger | More punch. Note: Can create small sediment in the jar |
Since we are doing a pressure based preserve, the equipment needs to be spot on. Don't try to shortcut this with a water bath; carrots are low acid foods and require a pressure canner to be safe.
Essential Tool Kit
You'll need a Ball Pressure Canner or a similar weighted gauge system. I also suggest using a wide mouth quart jar, as it makes packing the carrot sticks much easier. If you use narrow jars, you'll spend half your time fighting with the vegetables to get them to fit.
A bubble remover tool is another must have. I used to use a plastic knife, but it often nicked the sides of the jar or pushed the carrots too far down. A proper bubble remover allows you to release trapped air without disturbing the headspace.
Finally, keep a cloth dampened with white vinegar nearby. Sugar is sticky, and any residue on the rim of the jar will prevent a proper vacuum seal. According to Ball Canning guidelines, a clean rim is the most critical step for long term shelf stability.
Detailed Processing Steps
Let's get into the actual work. Right then, let's crack on.
Phase 1: Preparing the Produce
- Scrub your carrots thoroughly under cold water, peel the skin, and slice them into uniform sticks about 7.6 cm (3 inches) long and 1.3 cm (1/2 inch) thick.
- Toss the carrot sticks with sea salt in a large bowl. Note: Let them sit for a few minutes to draw out moisture.
Phase 2: Crafting the Glaze
- In a medium saucepan, combine the brown sugar, strained orange juice, cinnamon, and ginger.
- Bring the mixture to a medium boil, whisking constantly until the sugar has completely dissolved.
- Simmer for 5-7 minutes until the syrup is slightly thickened and velvety.
- Turn the heat to low. Keep the glaze steaming, but don't let it come back to a hard boil.
Phase 3: The Ball Canning Process
- Pack the raw carrot sticks tightly into a sterilized quart jar, leaving exactly 2.5 cm (1 inch) of headspace.
- Ladle the hot glaze over the carrots, filling the jar while maintaining that 2.5 cm (1 inch) of headspace.
- Use your bubble remover tool to release any trapped air pockets until the liquid settles and bubbles stop rising.
- Wipe the jar rim with a vinegar dampened cloth, center the lid, and screw the band to finger tip tight.
- Process the jar in a Ball Pressure Canner at 11 lbs of pressure for 35 minutes.
- Allow the canner to depressurize naturally. Once the gauge reads zero, remove the jar and let it rest undisturbed for 24 hours.
Chef's Note: If you're feeling fancy, you can add a tiny pinch of cloves to the glaze. It doesn't change the chemistry, but it adds a deep, wintery note that pairs brilliantly with roasted meats.
Fixing Common Errors
When things go wrong with this Easy Glazed Carrots Ball Canning Recipe, it's usually because of temperature or pressure fluctuations. If your carrots come out looking grey, it's often a sign that the pressure was too low or the processing time was cut short, meaning the enzymes didn't fully deactivate.
Another issue is "siphoning," where the liquid leaks out during processing. This happens if the jars are packed too tightly or the headspace is too small. The pressure pushes the air out, and if there's nowhere for it to go, it pushes the syrup out with it.
Why Your Carrots Are Mushy
This usually happens if the carrots were pre boiled or if the pressure canner overshot the target pressure. When the internal temperature exceeds the limit, the pectin breaks down completely, leaving you with a puree instead of sticks.
Why Your Jars Didn't Seal
Most seal failures are caused by residue on the rim or under tightening the band. If the rim isn't pristine, the lid can't form a vacuum.
| Problem | Root Cause | Solution |
|---|---|---|
| Mushy Texture | Over processing | Pack carrots raw; check pressure gauge |
| Liquid Leakage | Low headspace | Ensure exactly 1 inch of gap |
| Grey Color | Under processing | Follow the 35 minute timer strictly |
Common Mistakes Checklist:
- ✓ Did you use a pressure canner instead of a water bath?
- ✓ Is the orange juice strained to avoid pulp?
- ✓ Did you wipe the rims with vinegar?
- ✓ Is the headspace exactly 1 inch?
- ✓ Did you allow the pressure to drop naturally?
Custom Flavor Tweaks
Once you've mastered the base, you can start playing with the flavors. If you want something a bit more sophisticated, you can replace half of the brown sugar with maple syrup. This creates a deeper, more woodland flavor that is incredible during the autumn months.
For those who like a bit of a kick, adding a pinch of cayenne pepper or a teaspoon of freshly grated horseradish to the glaze works wonders. It creates a sweet and spicy contrast that wakes up the palate. If you enjoy this kind of flavor profile, you might also love the zing of my Tangy Sloppy Joes recipe, which uses a similar balance of sweetness and acidity.
If you're looking for a sugar-free alternative, you can use a monk fruit sweetener blend. However, be careful: sugar provides much of the viscosity. Without it, the glaze will be thinner, and the carrots may not "glaze" in the traditional sense.
You might need to simmer the juice longer to reduce it before adding the sweetener.
Preservation and Waste
Stored in a cool, dark place, these canned carrots will stay fresh for up to 12 months. If you open a jar and don't use all the carrots, move them to a glass container with a lid and keep them in the fridge for up to 7 days.
Regarding freezing, I don't recommend freezing these once they've been canned. The canning process already changes the cell structure; freezing them again will almost certainly result in a mushy texture.
To keep things zero waste, don't throw away your carrot peels! I collect all my peels in a bag in the freezer. Once the bag is full, I simmer them with some onion scraps and celery ends to make a light, aromatic vegetable stock. It's a great way to get extra nutrition and flavor without spending an extra dime.
Serving Suggestions
These glazed carrots are a fantastic side for any heavy protein. They pair perfectly with a Juicy Slow Cooker Turkey Breast because the brightness of the orange juice cuts through the richness of the meat.
For a more casual meal, try serving them alongside a grilled pork chop or a piece of baked salmon. The cinnamon notes in the carrots complement the natural sweetness of pork beautifully.
If you're serving them as part of a holiday spread, I suggest warming them gently in a small pot with a knob of unsalted butter to bring back that velvety sheen.
If you have a sweet tooth and want to use carrots in a different way, you should definitely try my Cheese Carrot Cake Bars recipe. It's a great way to use up any leftover fresh carrots you have on the counter while you're prepping your canning jars.
Right then, that's the secret to a successful batch. Just remember to be patient with the depressurization and meticulous with your rims, and you'll have a pantry full of vibrant, tasty treats.
Trust me on this: there is nothing quite like opening a jar of these on a rainy Tuesday in February and tasting the sunshine of a summer harvest.
Recipe FAQs
What's the secret to perfectly glazed carrots?
Maintain a precise ratio of sugar to acid. This balance ensures the carrots stay firm and vibrant while soaking up the syrup without becoming mushy.
What are some common mistakes to avoid when making glazed carrots?
Avoid pre-cooking the carrots before canning. Doing so leads to over processing in the canner. Additionally, failing to wipe jar rims with vinegar can leave syrup residue that prevents a proper seal.
What kind of glaze is best for carrots?
A mixture of orange juice, light brown sugar, cinnamon, and ginger. This combination creates a velvety, zesty syrup that complements the natural sweetness of the root vegetable.
What kind of sugar is best for glazing carrots?
Light brown sugar. It provides a deeper, molasses like flavor and helps the syrup achieve a slightly thickened consistency during the simmering process.
How to slice carrots for the best canning results?
Cut them into uniform sticks approximately 3 inches long and 1/2 inch thick. Uniformity is critical so that every piece processes evenly under pressure.
Is it true that I should pre-cook the carrots before putting them in the jar?
No, this is a common misconception. You must pack the carrot sticks raw to maintain a crisp, tender bite after they spend 35 minutes in the pressure canner.
What is the best way to serve these glazed carrots?
Pair them with a savory main course. These sweet and tangy carrots complement a rich dish like a creamy beef skillet perfectly.
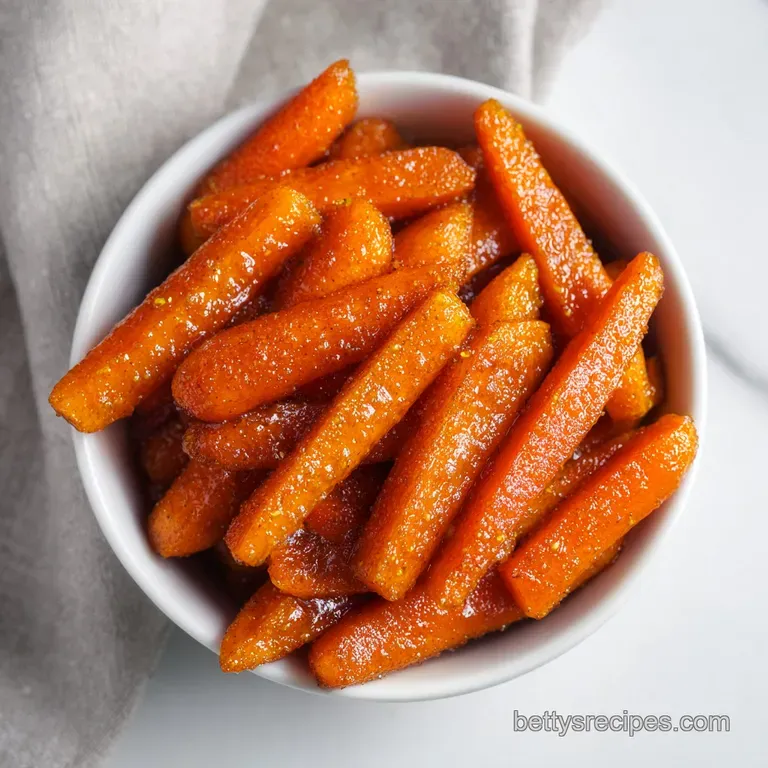
Glazed Carrots Canning Recipe