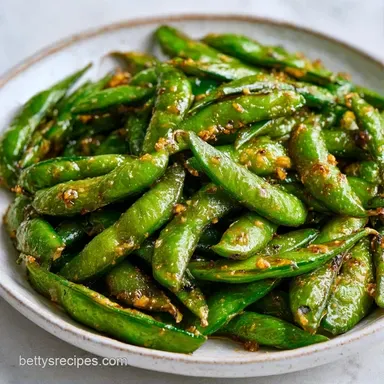
Charred Garlic Edamame in 10 Minutes
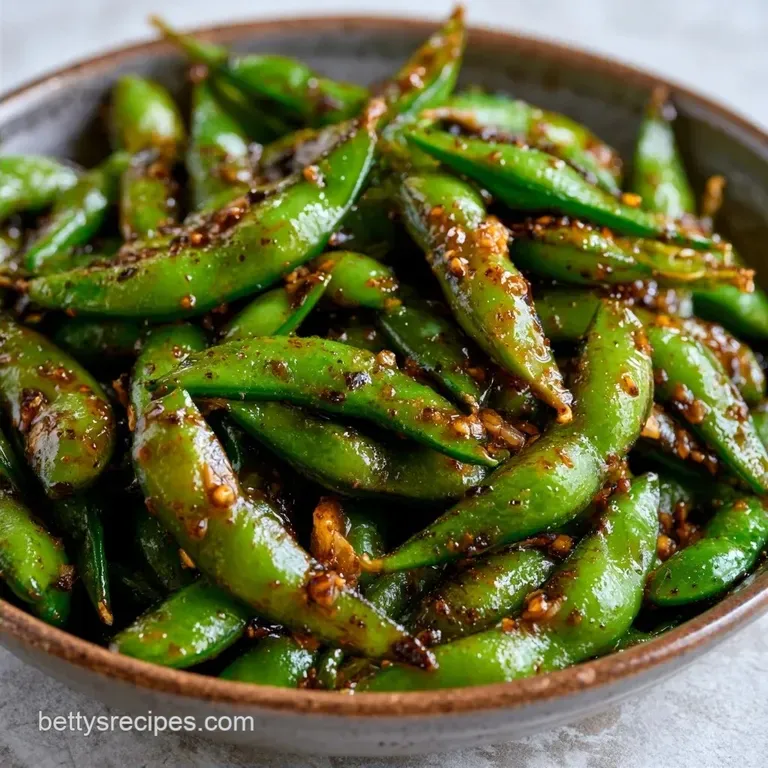
- Time: 5 min active + 5 min cook
- Flavor/Texture Hook: Charred, salty, and pungent garlic
- Perfect for: Quick game day appetizers or healthy protein snacks
Quick Charred Garlic Edamame
That sound of the pods hitting a ripping hot pan is the best part of this recipe. I remember making this for a few friends during a last minute happy hour, and the smell of searing garlic filled the whole kitchen in seconds. It's the kind of dish that makes people gather around the stove before you've even plated it.
Most of us just boil our soybeans, which is fine, but it's boring. Adding a over high heat sear changes the profile entirely, moving it from a side dish to a standalone snack. This version of Garlic Edamame hits that perfect balance of salty soy and sweet maple.
You can expect a dish that is punchy and aromatic. The pods get these little mahogany colored blisters that hold onto the sauce, making every bite intense. It's a fast way to get a high protein snack that actually tastes like it came from a restaurant.
Why the Method Works
- Dry Pods: Water is the enemy of a sear. If the beans are damp, they'll steam in the pan, which means no char and a mushy texture.
- The Well Method: Garlic burns fast. By pushing the beans aside and adding the garlic to a clear spot, we control the heat so the garlic gets gold, not black.
- High Smoke Point: Using avocado oil lets us hit high temperatures without the oil smoking or breaking down, ensuring the Garlic Edamame gets those blister marks.
| Method | Time | Texture | Best For |
|---|---|---|---|
| Stovetop | 10 mins | Charred & Glossy | Quick snacks |
| Oven | 20 mins | Roasted & Dried | Large batches |
Why These Ingredients
The base of this Garlic Edamame depends on the contrast between the salty soy sauce and the tiny bit of maple syrup. The syrup doesn't make it sweet, but it helps the sauce thicken and stick to the pods. Avocado oil is the smart choice here because it handles the heat needed for a proper sear.
Sesame oil is added at the end for that nutty aroma. If you put it in at the start, it would burn. The red chili flakes add a subtle warmth that cuts through the richness of the oil, while the fresh garlic provides the pungent heart of the dish.
Ingredients and Substitutions
- 1 lb frozen edamame in pods Why this? Easy to use and grips the glaze well
- Substitute: Fresh shelled edamame (reduce sauce slightly)
- 1 tbsp avocado oil Why this? Stable at very high temperatures
- Substitute: Grapeseed oil (similar heat resistance)
- 3 cloves garlic, minced Why this? Key for a sharp, aromatic taste
- Substitute: 1 tsp garlic powder (mix with soy sauce)
- 2 tbsp soy sauce Why this? Delivers salt and rich umami
- Substitute: Tamari (for a gluten-free version)
- 1 tsp sesame oil Why this? Provides a nutty, toasted aroma
- Substitute: Toasted walnut oil (comparable flavor)
- 1 tsp maple syrup Why this? Glazes the pods and offsets the salt
- Substitute: Honey or brown sugar
- 1/2 tsp red chili flakes Why this? Gives a mild, spicy warmth
- Substitute: Sriracha (use 1 tbsp; reduce soy sauce)
- 1/4 tsp black pepper Why this? Basic seasoning for extra complexity
- Substitute: White pepper (milder with floral notes)
Equipment Needed
You don't need much for this, but a wide skillet is a must. A cast iron pan is the best choice because it holds heat so well, but a stainless steel pan works too. Avoid non stick if you want a really deep char, as those pans often can't handle the heat required to blister the pods.
You'll also need a pair of tongs for tossing and a few paper towels to get the beans bone dry. A small bowl for mixing the sauce beforehand is helpful, though you can just pour the ingredients in one by one.
The Cooking Process
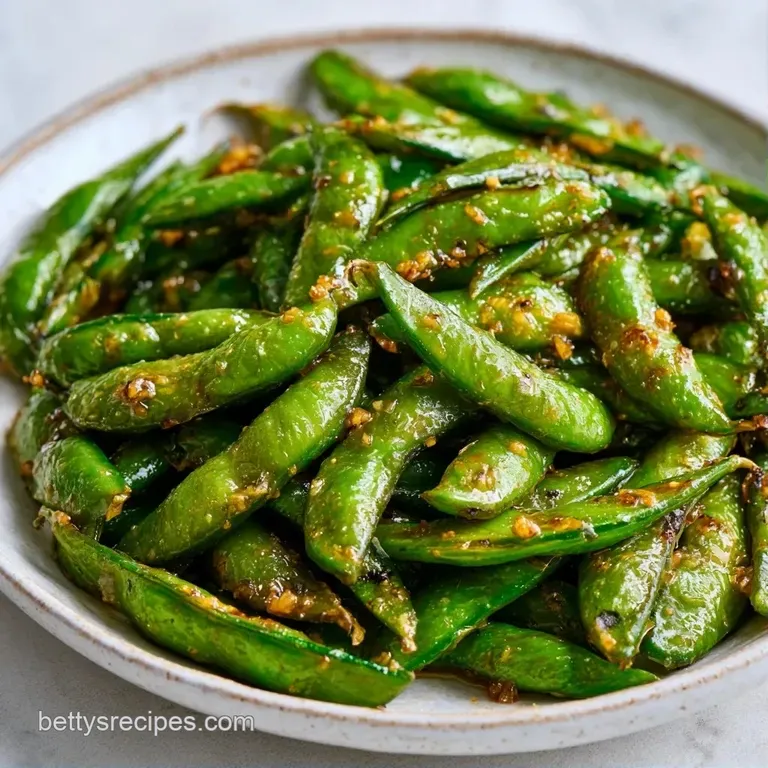
Step 1: The Moisture Purge
Thaw the edamame under cold water. Pat them thoroughly dry with paper towels. Note: Even a little moisture will cause the beans to steam instead of sear.
Step 2: The over High heat Char
Heat the avocado oil over medium high heat until it shimmers. Add the pods in a single layer. Let them sit undisturbed for 2 minutes until mahogany blister marks develop, then toss for another 2 minutes.
Step 3: The Aromatic Infusion
Reduce the heat to medium. Push the pods to the sides of the pan to create a hole in the center. Add the minced garlic and chili flakes. Sauté for 30 45 seconds until the garlic is pale gold and fragrant.
Step 4: The Glaze Reduction
Pour in the soy sauce, sesame oil, maple syrup, and black pepper. Toss rapidly for 1 minute until the sauce bubbles and coats the Garlic Edamame in a glossy glaze, then remove from heat immediately.
Fixing Common Issues
If the pods feel soft rather than charred, you likely had too many in the pan or the heat was too low. This causes the temperature to drop, and the beans release water. I once tried to double the batch in a small pan, and I ended up with boiled beans in a sauce. Always work in batches if your pan is small.
When the garlic tastes bitter, it's because it spent too long in the pan or the heat was too high. Garlic turns from fragrant to acrid in a matter of seconds. If you see the garlic turning dark brown, pull the pan off the heat immediately and add the soy sauce to cool it down.
| Problem | Fix |
|---|---|
| Sauce is too watery | Increase heat for the final 30 seconds to reduce |
| Garlic tastes bitter | Sauté for a shorter time or lower the heat |
| No char on pods | Pat drier and use a wider pan for more space |
| Goal | What to change |
|---|---|
| More heat | Double the chili flakes |
| Less salt | Use low sodium soy sauce |
| Extra sweetness | Increase maple syrup to 2 tsp |
Adjusting Your Batch Size
For a smaller batch (1/2 lb), use a smaller skillet and reduce the cook time for the initial sear by about 20%. You'll still need a similar amount of oil to ensure the pan is coated, but you can halve the sauce ingredients.
When scaling up to 2 or 3 lbs of Garlic Edamame, do not crowd the pan. If you add too many pods, they will steam. Work in batches of 1 lb each. For the sauce, don't just multiply the salt and soy by three. Start with 2x the sauce and taste before adding more, as the salt can become overwhelming in larger quantities.
Storage and Zero Waste
Store leftover Garlic Edamame in a glass jar and keep them chilled for 3 days. To reheat, I suggest a quick toss in a hot skillet for 2 minutes. While the microwave is an option, the edamame often lose their charred finish and can become slightly rubbery.
Don't toss out any extra sauce left in the pan; it's essentially a potent umami glaze. I typically drizzle it over steamed rice or use it as a fast marinade for tofu. Per USDA guidelines, ensure cooked vegetables are cooled and refrigerated within two hours to remain safe.
Dietary Adaptations
For a fully vegan and gluten-free version, simply swap the soy sauce for tamari. Everything else in this recipe is naturally plant based. If you want something more refreshing, you can toss these pods into an Edamame Salad with cucumber and sesame seeds.
If you prefer a "umami bomb" version, add a teaspoon of miso paste to the glaze. You'll need to whisk it with the soy sauce first so it doesn't clump. For those who want a more savory profile without the syrup, a pinch of brown sugar or a splash of mirin works well to keep the glaze glossy.
Serving Garlic Edamame
This dish is best served immediately while the pods are still hot and the garlic is fragrant. It works as a standalone snack, but it's also a great addition to a larger spread. I love pairing this with a side of Egg Fried Rice for a complete, protein heavy meal.
For a party platter, pile the pods in a ceramic bowl and sprinkle with toasted sesame seeds or sliced scallions. The bright green of the pods against the mahogany sauce looks great on a table. Since it's a finger food, just make sure to provide a small bowl for the empty pods.
This Garlic Edamame is a fast, smart way to get a nutrient dense snack on the table without any fuss. Once you get the hang of the sear, you'll never go back to just boiling them. Enjoy!
Recipe FAQs
Is garlic edamame healthy?
It is a nutrient dense plant protein rich in fiber and vitamins.
Tip: Use avocado oil to achieve a high heat sear without smoking.
Do frozen edamame beans need to be cooked?
They are usually blanched before freezing but require heating for optimal texture and safety.
Tip: Thaw under cold water and pat them thoroughly dry to prevent steaming.
How to eat edamame beans?
Pop the beans out of the pods with your teeth and discard the shells.
Tip: Avoid eating the pods themselves as they are too fibrous to digest.
Is it true that edamame and broad beans are the same?
False. Edamame are young soybeans, whereas broad beans are fava beans.
Tip: If you love these legumes, the same protein rich logic applies to our baked feta pasta with chickpeas.
Why does my stomach hurt after eating edamame?
Complex sugars called oligosaccharides in soybeans can cause gas or bloating for some people.
Tip: Start with small portions to help your digestive system adapt to the fiber.
What seasonings work best for edamame?
A combination of soy sauce, sesame oil, and minced garlic provides the best umami flavor.
Tip: Sauté the garlic and chili flakes for only 30 45 seconds to prevent burning.
Charred Garlic Edamame